After extensive house hunting in December 2000 my wife came upon the perfect
house. Her perfect house had a backyard with a steep incline so when standing
at the back property line you were actually overlooking the roof of the house.
Then and there I made a decision to find a way to eliminate lawn mowing.
Naturally my first thought was to build brick or stone retaining walls, which
would contain landscaping of all kinds. Upon pricing with several companies the
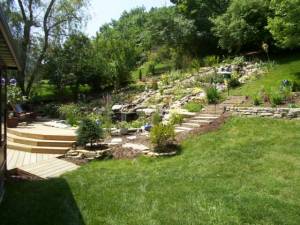
expense was too great. My thinking then turned to building a waterfall using the
natural 30-degree incline of the yard completing the project with a pond. I
began a search of information on how to build a waterfall and pond. Being new to the
area I didnt have much luck. Most garden stores gave minimal information and they
really had no idea of the scale I intended to build. Eventually I met T.J. at
Grandmas Garden and he helped me to re-landscape a small area by our mailbox, and then
move up to a larger area near the front house. I really had no previous landscape
experience but was committed to improving our houses curb appeal. In my talkings with
T.J. he told me something, which Ive taken to heart on every project, I began, If you
dont like your finished design youre only a shovel away from fixing it. This gave me
the confidence to design and complete my next landscape project-the waterfall and pond.
 Back in my mind was all that uphill mowing and now that I have more knowledge and
confidence I began looking around for a Landscaping Company who could build a waterfall
and pond. The beginning work went incredibly slow and at times very frustrating. There
were not many companies who would spend the time to listen to what I wanted, give input,
and come up with an affordable plan. Finally I ran into some great luck and paired up
with Michaels Landscaping. The ground was broken, and my two creek waterfalls began
flowing into a twenty-five feet pond. Now the real journey and obsession had begun.
Just about everyone you talk with in the water garden club have had their
growing pains making their ponds just perfect and I was certainly no exception.
Back in my mind was all that uphill mowing and now that I have more knowledge and
confidence I began looking around for a Landscaping Company who could build a waterfall
and pond. The beginning work went incredibly slow and at times very frustrating. There
were not many companies who would spend the time to listen to what I wanted, give input,
and come up with an affordable plan. Finally I ran into some great luck and paired up
with Michaels Landscaping. The ground was broken, and my two creek waterfalls began
flowing into a twenty-five feet pond. Now the real journey and obsession had begun.
Just about everyone you talk with in the water garden club have had their
growing pains making their ponds just perfect and I was certainly no exception.
The first year we had lots of flooding problems when it rained. One down pour
washed all the mulch into the pond. Later a 3 and hour rain flooded our entire
backyard. I built a French drain the length of the waterfall creek then built
retaining walls to keep the dirt up the hill. Once the water problem was fixed
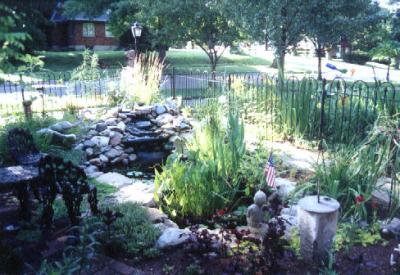
the planting started to take shape. I have since lost track of the names of
everything planted and in the fall the plants are amazing. To help get rid of
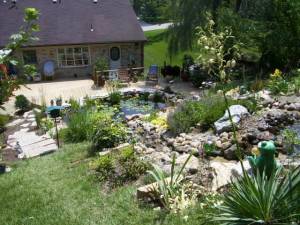
the backyard mud I build a deck last summer and now my wife and I spend many
hours sitting and watching the fish frogs, birds, squirrels, and yes even deer.
As I sit there Im always thinking of how to change, add to, or improve the looks
of my little pond and then think to myself, I did cut down on the hours spent
lawn mowing."
|
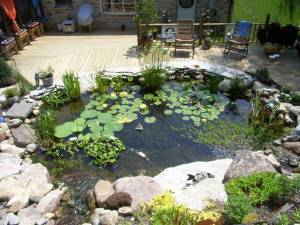
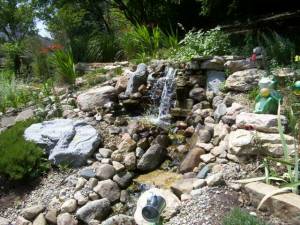
Materials Used For My Pond
The pond is 15 x 20 x 3 deep with 2 waterfalls and has 2 streams coming from a main bio-waterfall.
- Clean sweep skimmer and pre filter
- 2 filter mat
- mesh debris bag
- 45-mil rubber liner
- Vancs Pump, 50pu 2.45 72 gal pm or 4,320 per hr.
- Bio filter, 30 x 30 x 30, 3pcs. 2 filter mats, 3 bags of lava rocks
- 40 tons of stone and rock
|